BUILD IT
Order by November 13, build December 1 to January 24. Every step happens on a day with no MS-2000 test.
Shopping list
15 kinds of parts from 6 stores, about $223.12 before shipping and tax. Prices checked Sep 18, 2026. Open every link again before ordering.
- microSD card, 32 GB, for the Pi
- 4 x M2.5 x 6 mm screws for the Pi; 4 x M2 x 8 mm for the box floor (MS-2000 M2 kit)
- 30 AWG silicone wire and heat shrink
- 10 mm hook-and-loop strap
- Clear report-cover plastic for the wings
- Poster board and a printed high-contrast pattern for the flight mat
- PLA: white (about 3 g) and dark gray or black (about 13 g) for the flying parts; any color for the pad and box
- Kitchen scale (1 g) and 7 US nickels (5.000 g each) for the Can it fly? experiment
- Female 1x6 pin headers (4) only if the drone does not come with them for the positioning module
The drone and the module ship from India through Tindie; allow 3 weeks. The Amazon listings are the faster backup. Battery and habitat prices are estimates until the order.
Print plates
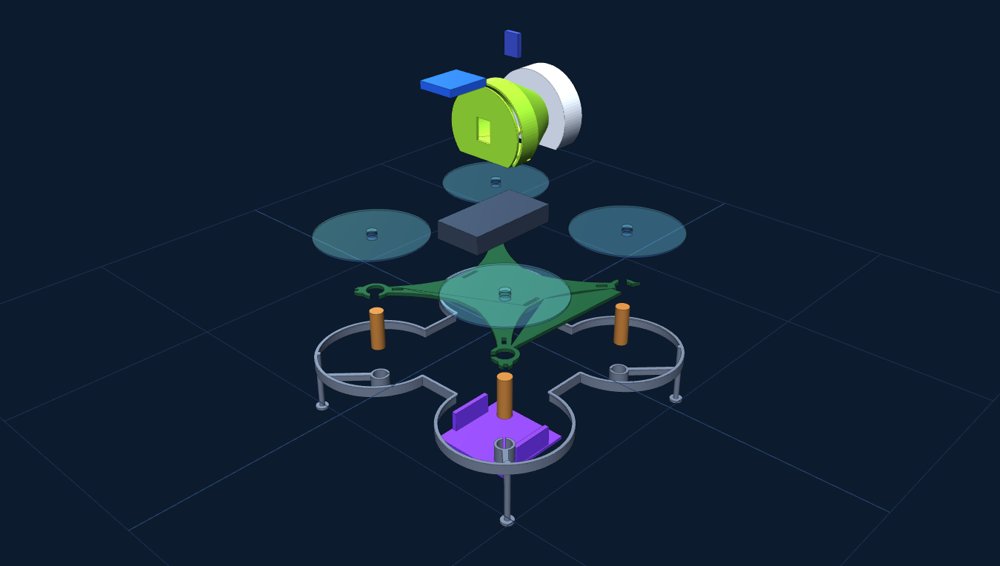
7 plates for the Flashforge Adventurer 5M, about 5 hours 44 minutes and 205 g. 0.2 mm layers, no supports, 5 mm brim. The flying parts are plates 2 to 4, about 15 g once the brim comes off.
3D models
Spin them, zoom in, and see the sizes. Each one also has its STL file.
The build guide
18 steps in six parts, with safety rules, wiring maps, the code, and a fixing-it table. Same style as the MS-2000 and Dusty guides.
Build plan
Week by week. Each week ends with something that works.
- 1Check every part against the shopping listSame as Dusty: a wrong or missing part is found on day one, not build day.
- 2Measure with calipers: motor can below the board, prop height, battery size, module dropThese four numbers are guesses in the 3D model. Write them in the journal.
- 3Charge a battery and check its plug polarity against the + and - on the boardPlug polarity is not the same on every battery brand.
- 4Fly the plain drone with the LiteWing phone app for 2 minutesProves the drone works before we change anything.
- 5Flash the positioning module firmware and plug the module in, arrow toward the USB-C portLiteWing web flasher, Chrome only.
- 6Print plate 1, the fit check. Pick the collar that grips a motor without splittingThat number goes into the guard before it is printed.
- 1Update the 3D model with the real numbers and re-sliceOnly the parts that changed.
- 2Print plates 2, 3, 4: guard, window, bodyAbout 1 hour 10 minutes total.
- 3Weigh every part on a kitchen scale and fill in the weight tableReal grams replace the estimates.
- 4Can it fly? Test A: push test on the kitchen scale at 25, 50, 75 and 100% powerOur math predicts about 120 g at full power. See the Can it fly? page.
- 5Can it fly? Test B: hover until the low-battery light with 0 to 35 g of nickels, 3 flights eachPrediction: about 9 minutes empty, 5.5 minutes with our 26 g. The answer decides keep, go lighter, or bigger props.
- 1Make the flight mat: poster board with a printed high-contrast patternThe floor camera needs texture to see movement. A plain floor makes it drift.
- 2Install Python and the LiteWing library on the laptop; connect to the drone WiFiCrazyflie cflib, the same library LiteWing uses.
- 3Take off, hover at 0.4 m for 20 seconds, landPosition hold on. Measure how far it drifts.
- 4Fly a slow square, then a figure eight, inside the zoneStart at 0.2 m/s.
- 1Wire the light sensor to the XIAO; tap two thin wires to the drone battery plug for powerUnplug the battery after every session: the XIAO is always on.
- 2XIAO program: watch the light, send HIT over the drone WiFi when it jumpsFlashlight flick test, same as the MS-2000 pod.
- 3Print plates 5, 6, 7: pad, box, floorAbout 4 hours 25 minutes. Good overnight prints.
- 4Set up the Pi: flight script, button, HIT listener, micro:bit linkThe Pi starts the script by itself when it turns on.
- 5Addie writes the micro:bit program: GO arrow, HIT count, radio group 7MakeCode, like the MS-2000 wand.
- 1Press GO: take off, 30 second pattern, land on the padOnly on days with no MS-2000 experiment. Laptop and flyer only.
- 220 test flights in a row. Write down every crash and whyGoal: 18 of 20 land on the pad.
- 3Flashlight hits during a flight must reach the micro:bitCount hits sent and hits received.
- 1Teach the MS-2000 camera the flyer (Object Tracking)This replaces the stuffed mosquito it learned. The MS-2000 experiments are done by Jan 15.
- 210 runs of 30 seconds. Count hits, time to first hitSame numbers as the MS-2000 experiment, so they can be compared.
- 3Teach the camera the stuffed mosquito againThe fair demo uses the stuffed mosquito.
The four programs
Three run in the box and the body. The micro:bit one is Addie's.