BUILD IT
Everything to build the MS-2000: the parts to buy, the 3D printed body, and the steps to put it together.
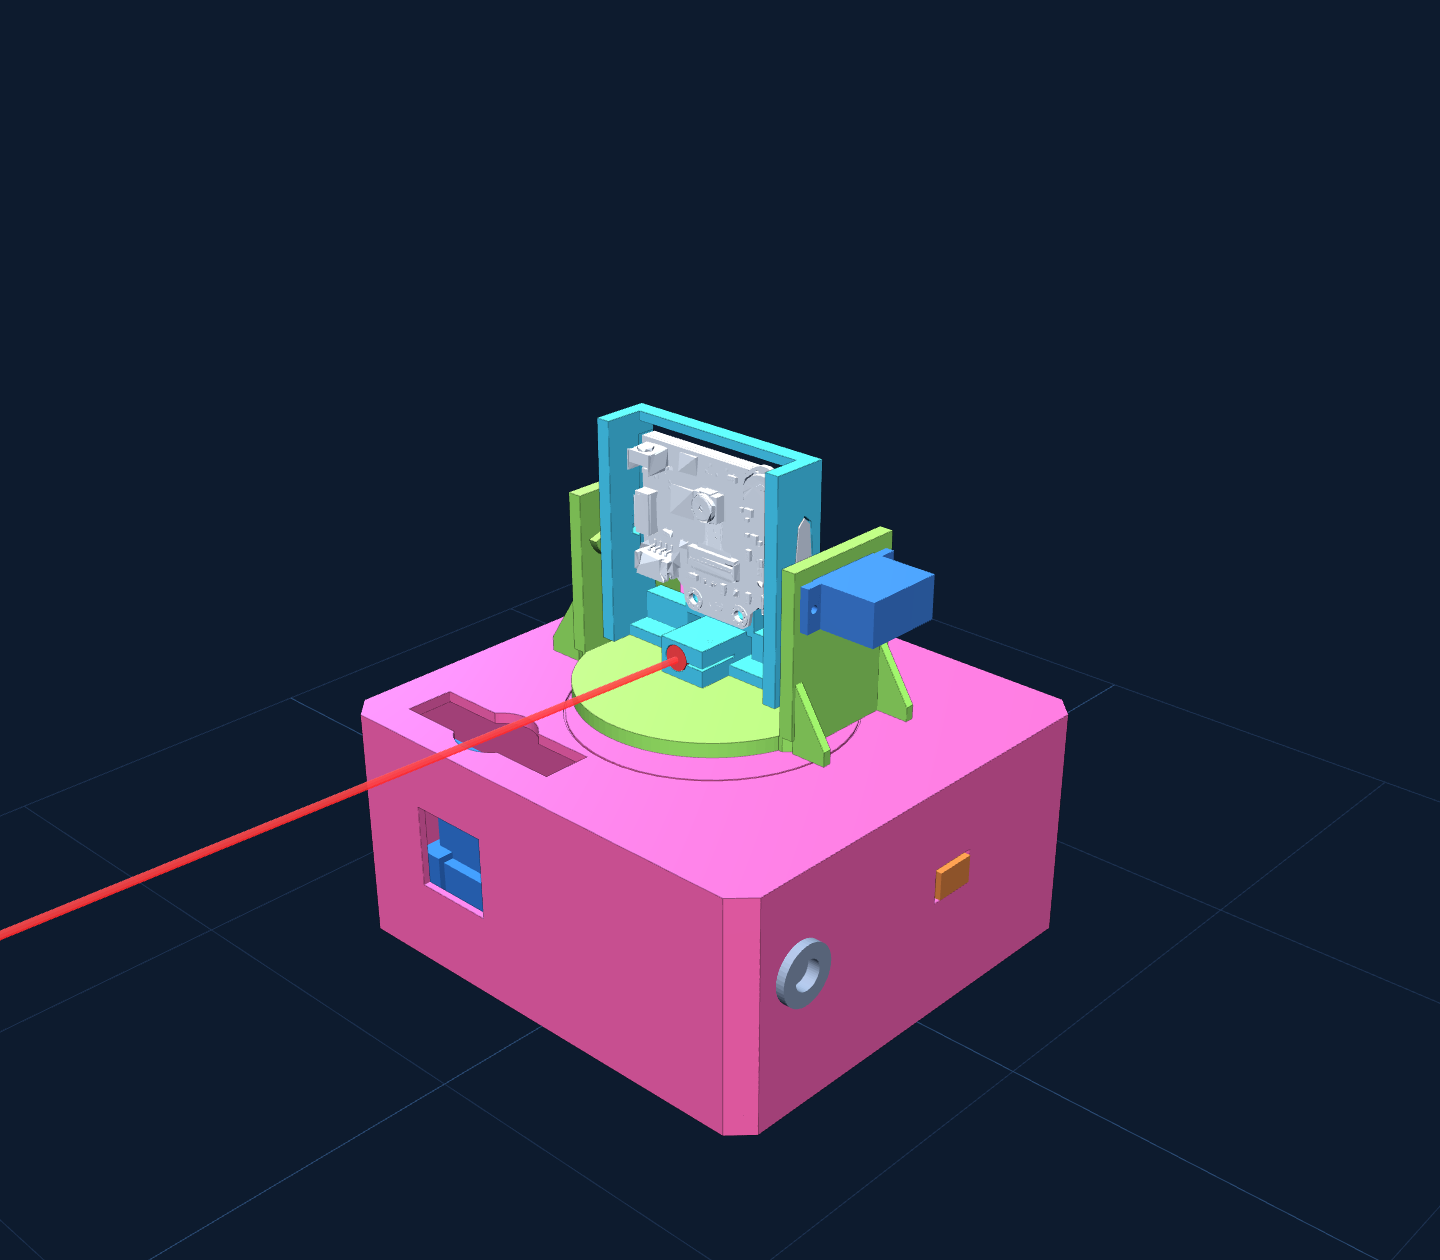
A micro:bit reads an AI camera and turns two servos to keep the mosquito centered, then switches on a safe Class 2 laser. A second micro:bit in the wand feels each hit through a light sensor and saves it as data.
The design is locked. Any change to parts, sizes, or aim goes through a change order first.
Four steps
A grown-up helps with the printer, the soldering iron, and the laser.
- 1
Get the parts
Two micro:bits, a board, an AI camera, three servos, a tiny laser, light sensors, a speaker, and a rechargeable power bank. About $224 from four stores.
- 2
Print in five batches
12 printed parts on five plates. About 10 hours 45 minutes and 335 g of PLA. One plate must be white.
- 3
Put it together
The mosquito and wand, then the turret head, then the backdrop and pendulum, then the code and sounds.
- 4
Teach it and test it
Train the camera on the mosquito, check every hit is saved, then run the 30 experiment runs.
How the parts work together
Seven parts, one after another, in less than a second.
- 1SeeHuskyLens cameraFinds the mosquito it learned and reports where it is on the screen.
- 2ThinkTurret micro:bitWorks out which way to turn so the mosquito is in the middle.
- 3AimPan and tilt servosTurn the head left, right, up, and down, a little at a time.
- 4FireRelay and laserWhen the mosquito is centered, the relay clicks the laser on. Pew!
- 5FeelLight sensor in the mosquitoThe white pod glows when the dot hits it. The sensor notices.
- 6ProveWand micro:bitFlashes the red eyes, plays a splat, saves the hit, and radios the turret.
- 7CheerSpeakerThe turret plays the victory sound.
Want to know why each one works? It is all on the Learn the science page.
Shopping list
Order from DFRobot ($152.70), DigiKey ($37.24), Walmart ($23.84), and Adafruit ($9.75). $223.53 before shipping and tax. The PDF has a backup source for every part.
From the store or at home
About $30 in all.
Tools
3D models
Spin them with a finger or a mouse. They open in any web browser.
The whole setup
Turret, backdrop, pendulum, the mosquito on its line, the wand, and the laser beam.
Bought parts
Every part we buy, with its size. Numbers get checked with calipers when they arrive.
Every printed part
A 3D viewer for each of the 12 printed parts, with notes on what each one does.
Print files
12 parts. The print plan has them already laid out on five plates for the Adventurer 5M. Single STL files are here for reprinting one part.
| Part | Qty | Plate | |
|---|---|---|---|
Base shell The body. Holds the board, power bank, speaker, arm switch, side switch, and charge port. Plate 1. | 1 | 1 | 3DSTL |
Floor plate The bottom. The board and power bank sit on it. Plate 2. | 1 | 2 | 3DSTL |
Turntable and tilt yoke Spins left and right on the pan servo and holds the head. Plate 3. | 1 | 3 | 3DSTL |
Pivot pin The axle on the left side of the head. Plate 3. | 1 | 3 | 3DSTL |
Camera and laser head Holds the camera and the laser, lined up to meet 3 feet away. Plate 3. | 1 | 3 | 3DSTL |
Wand handle Holds the wand micro:bit and batteries on the fishing rod. Plate 3. | 1 | 3 | 3DSTL |
Sensor pod, back Holds the light sensor inside the mosquito. Plate 3. | 1 | 3 | 3DSTL |
Sensor pod, frontWHITE The white cup that glows when the laser hits it. Plate 4. | 1 | 4 | 3DSTL |
Cable clipsWHITE Keep the thin cable next to the fishing line. Plate 4. | 1 | 4 | 3DSTL |
Backdrop foot Holds the black poster board up. Plate 2, 5. | 2 | 2, 5 | 3DSTL |
Pendulum pivot Where the line swings from. Marks 10, 20, and 30 degrees. Plate 5. | 1 | 5 | 3DSTL |
Backdrop clip Holds the dowel straight out from the board. Plate 5. | 1 | 5 | 3DSTL |
Also needed and not printed: the M2 screw kit, the HuskyLens M3 screws (in its box), servo horn screws (in the servo bags), zip ties, and hook-and-loop tape.
Build steps
Sixteen steps in five parts, with diagrams, wiring maps, and the MakeCode programs. Built October to mid-November, practice until December 11.